Here’s a step by step lesson on painting a bunch of grapes from a reference photo.
First, make sure you photograph your subject in bright, dramatic lighting. Long shadows and transparent grapes are exciting to paint.

Print out a full size color photo on good photo paper. I always add a little black and white image too so I can ‘see’ the values accurately.

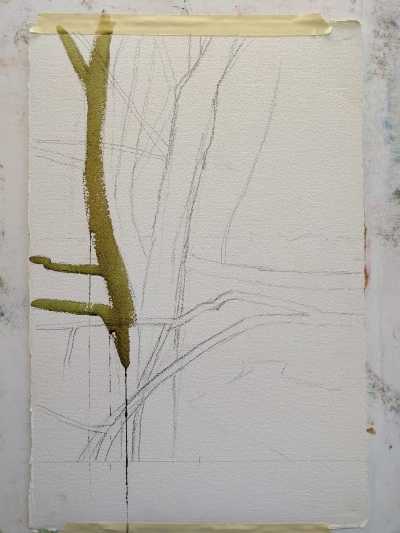
Trace the image onto tracing paper and then blacken the back of the tracing paper with graphite.

Tape the tracing paper to your watercolor paper (graphite side down) and using a ballpoint pen transfer the drawing to the watercolor paper.


Tape around the image to ensure nice clean edges when the painting is complete. Use only white or pale beige masking tape - colored tape can affect your ability to judge color accurately.

Begin painting the elements such as stems and grapes. We will paint the background and shadows last.
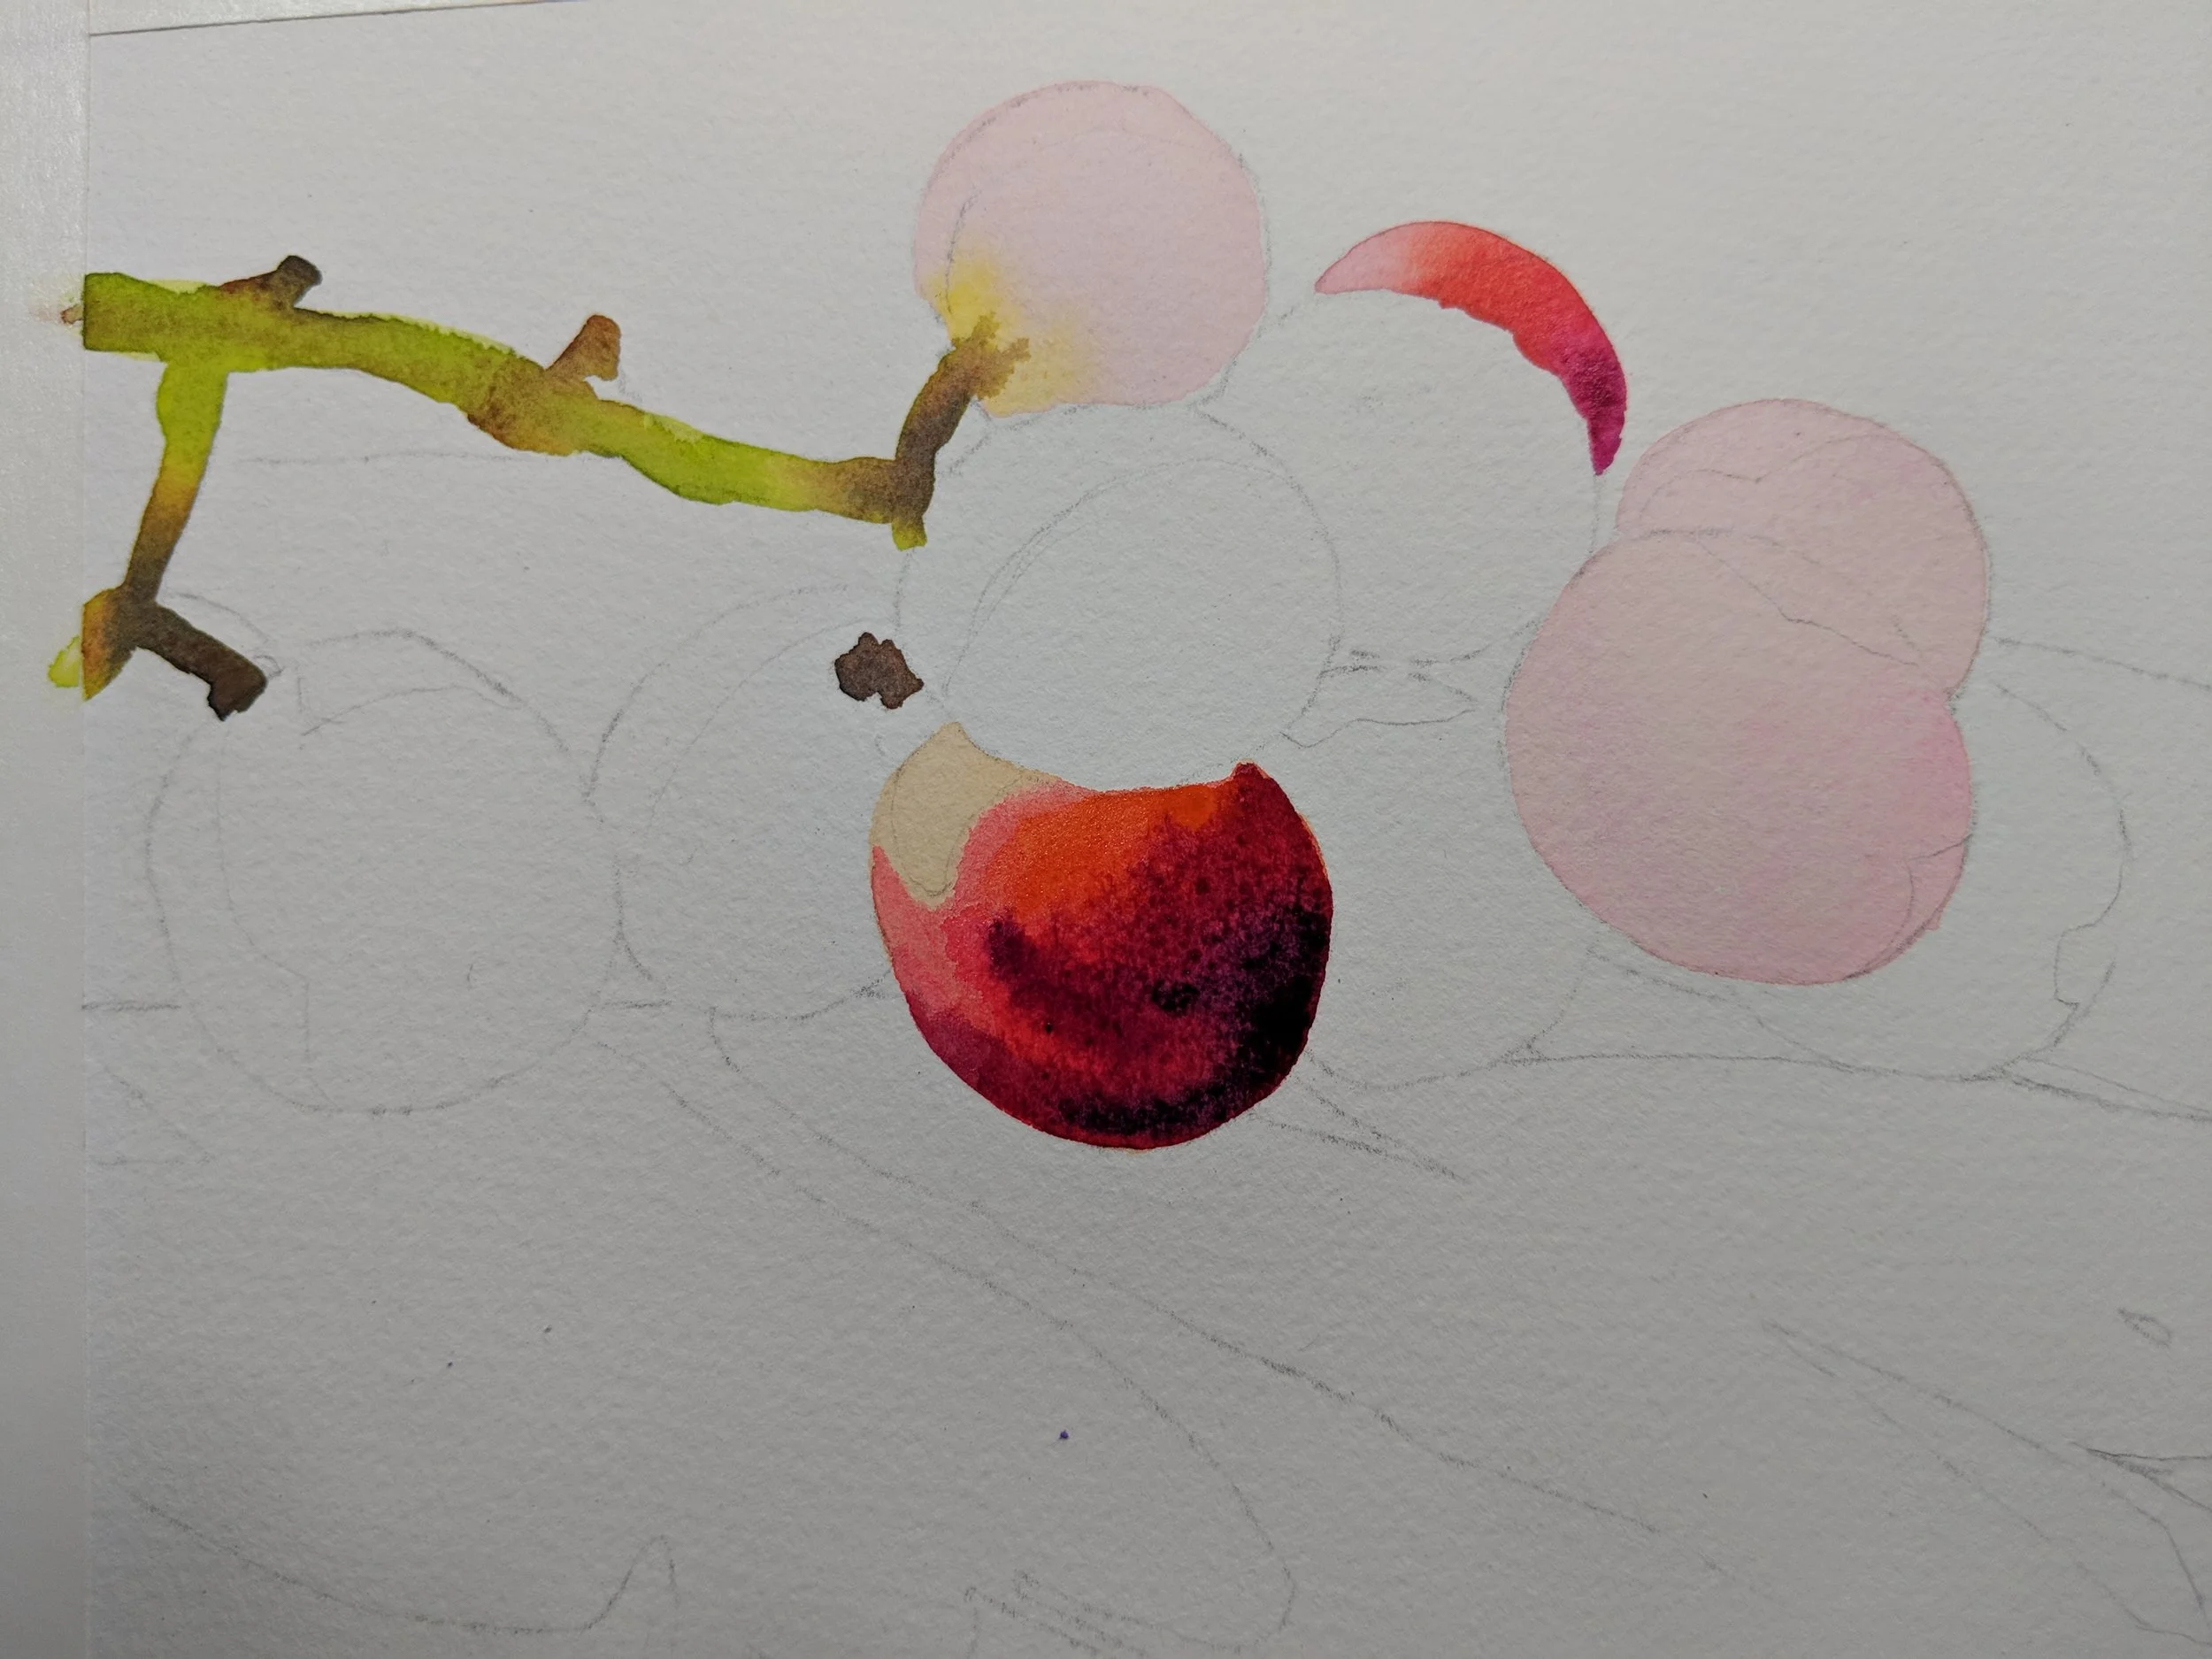
Drop in dark colors while a grape shape is wet, also soften edges as needed while the shape is wet.
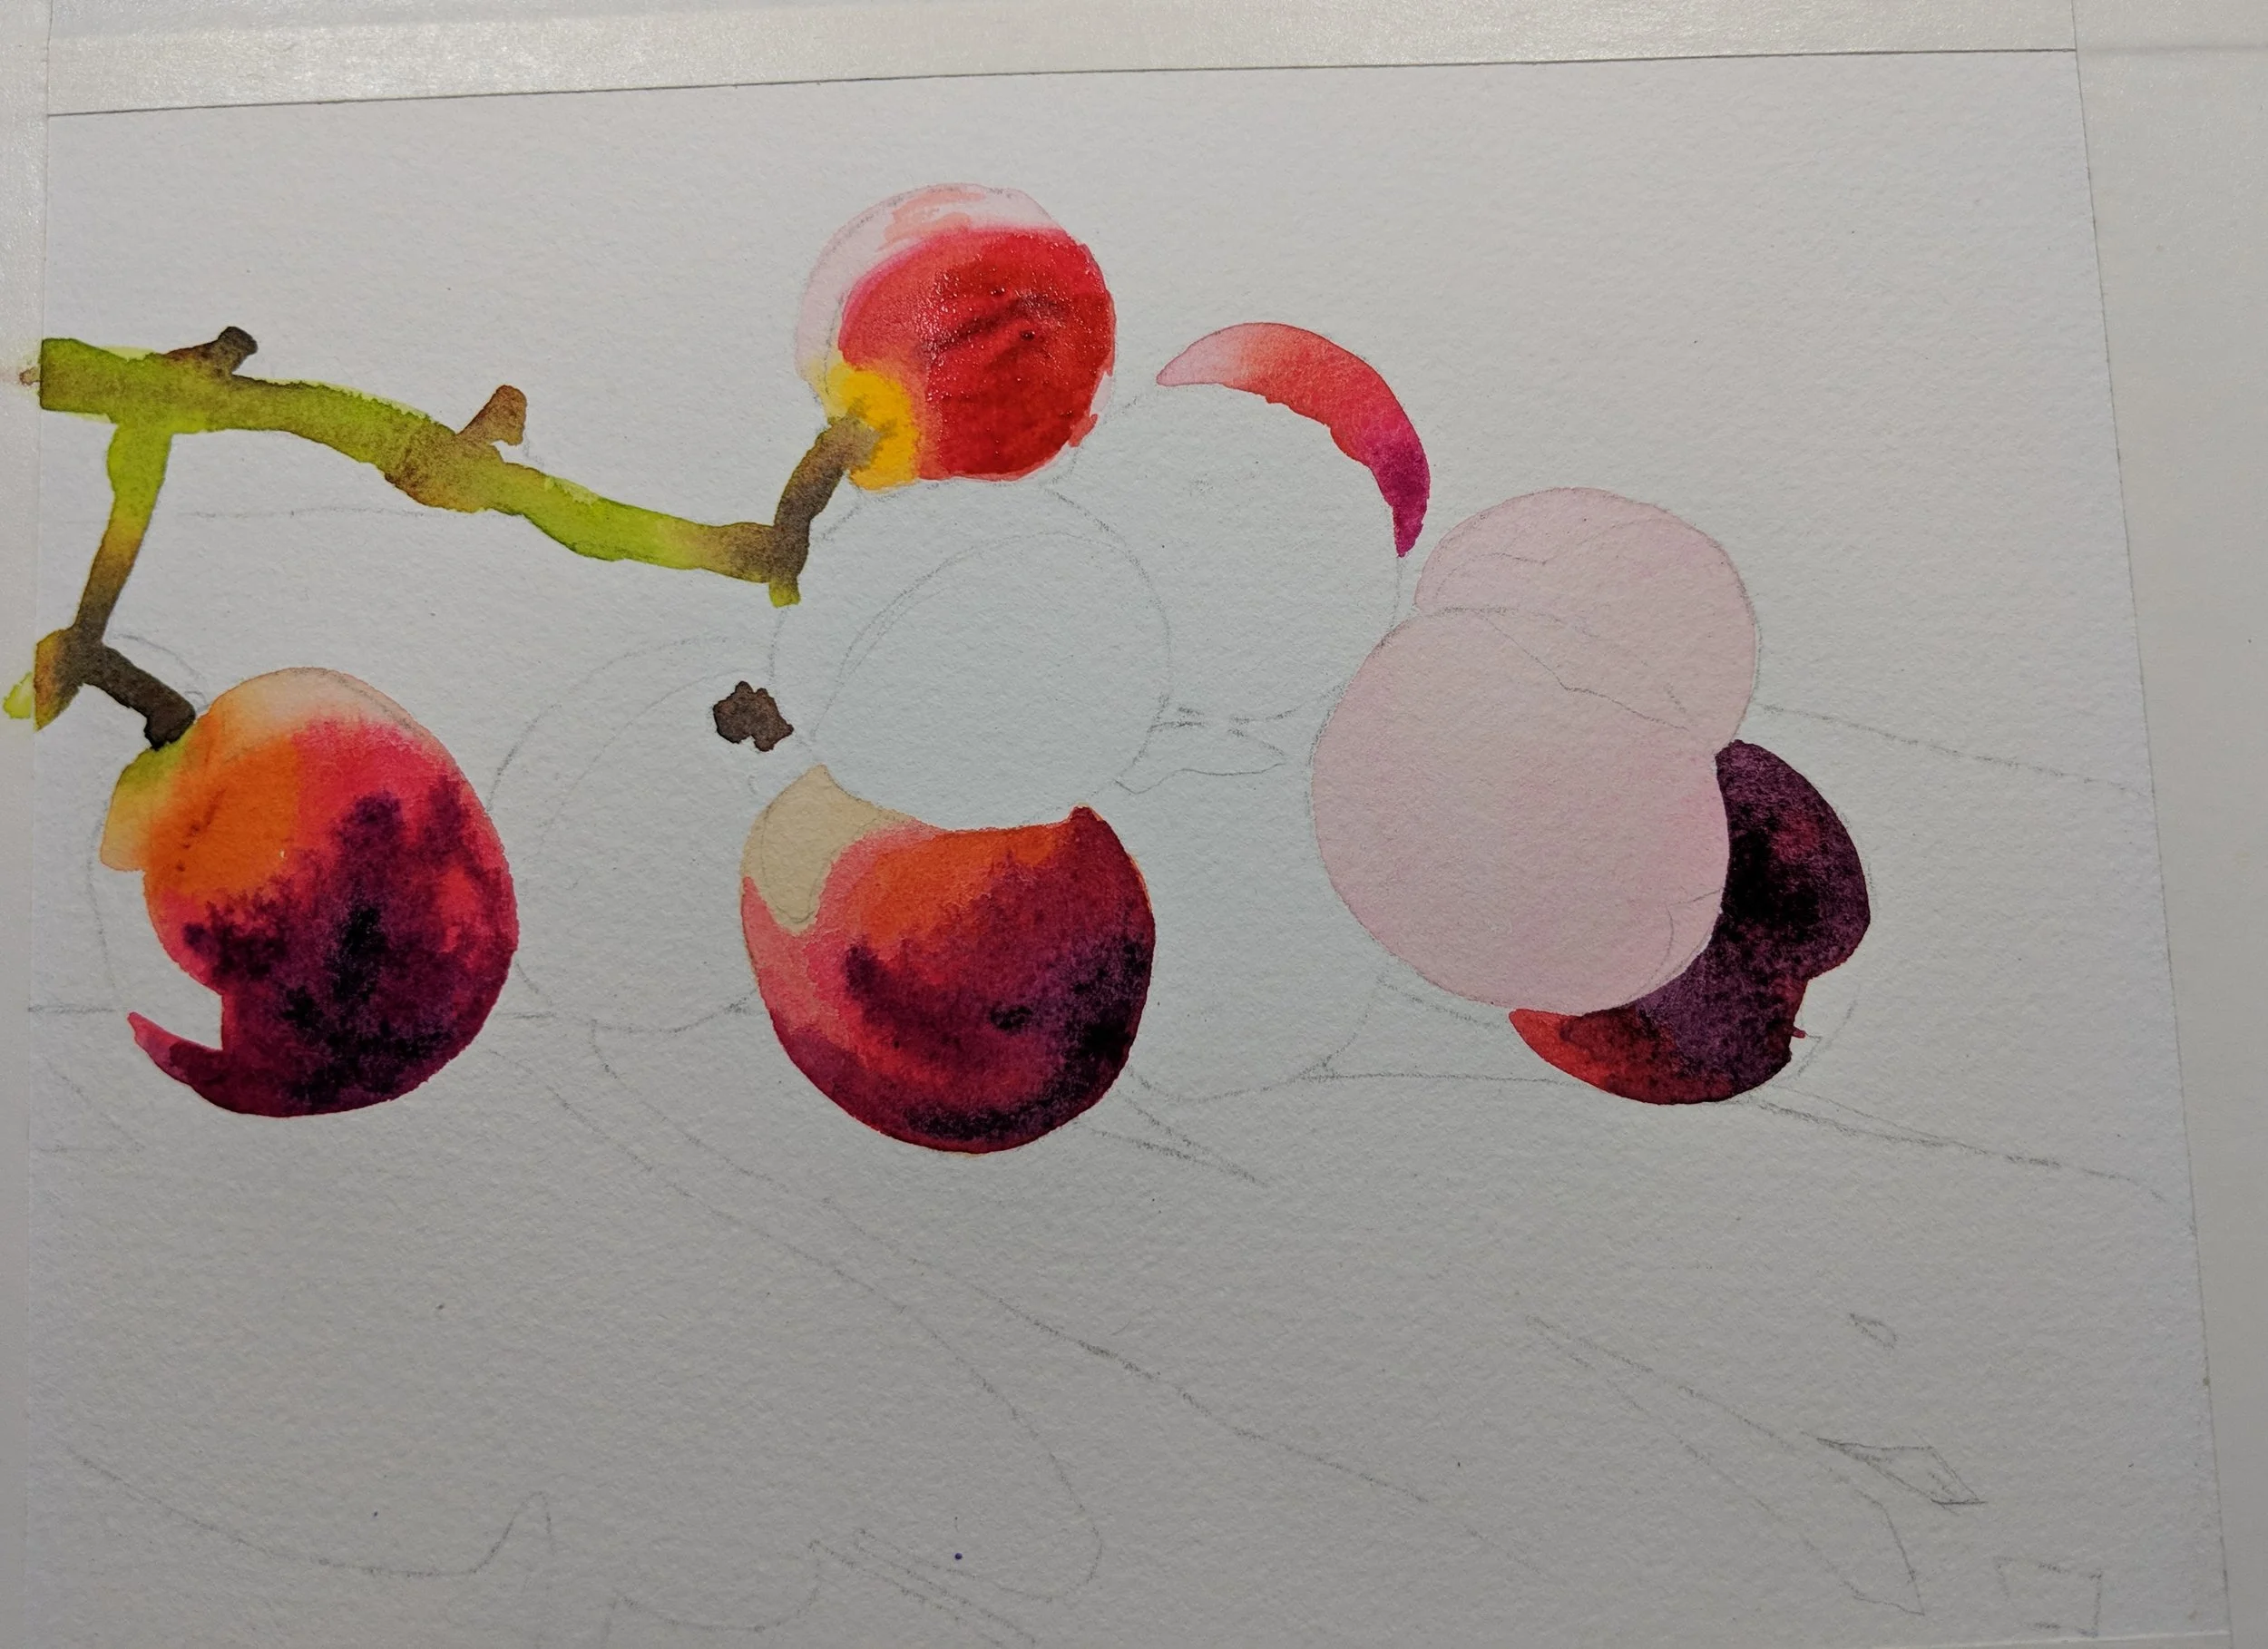
continue painting one grape at a time, remembering to paint around reflective light shapes as seen on the furthest left grape.
To see a couple of videos of me painting the shadow shapes under the grapes click on this link https://photos.app.goo.gl/Ga99qyJJAJDjFUgN8